VCF on VxRail Integration & Use-Cases Testing with VMC on AWS Blog Series – Part 3: Hybrid Cloud Extension (HCX) Configuration Walkthrough
In part 1 of 5 parts blog series, I provided you with an overview & configuration of Hybrid Linked Mode between VMC SDDC Cloud vCenter and On-Premises VCF on VxRail.
In part 2 of 5 parts blog series, I provided you with step-by-step guide on Hybrid Cloud Extension (HCX) Deployment on ‘On-Premises’ & ‘VMC on AWS’
In this part 3 of 5 parts blog series, I will cover how to establish the state of hybridity. It is the foundation for Cross Cloud Mobility.
HCX state of hybridity is made up of 2 main components.
- HCX Interconnect
- Network Extension
Let us go in-depth into each of these components and see how they look.
We have deployed HCX on both the On-Premises and VCM SDDC Cloud on previous part of the blog. Now we are going to explore the HCX configuration.
To configure HCX service, we will access HCX UI component installed in previous step within the On-Premises vCenter web client.
Open HCX UI from vCenter ‘Menu’ option.
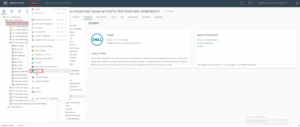
We have paired On-Premises HCX instance with VMC SDDC HCX Cloud instance. Notice site pairing status is Up.
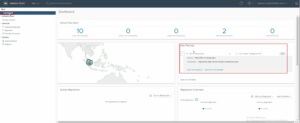
Once the sites are successfully paired, click on ‘Interconnect’ from HCX UI.
HCX Interconnect provides a secure pipeline for migration, extension and Virtual Machine protection between two connected VMware HCX sites.
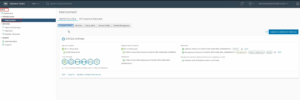
The first Tab i.e. Multi-Site Service Mesh which allows further to setup ‘Compute Profile’, ‘Site Pair’, ‘Service Mesh’ & ‘Network Profile’
The Multi-Site Service mesh is used to create a secure transport fabric between two sites.
Have a look at ‘Compute Profiles’ configuration.
A Compute Profile contains compute, storage, and network settings that HCX uses on this site to deploy the Interconnect-dedicated virtual appliances when a Service Mesh is added.

Next option in the ‘Multi-Site Service Mesh’ is the ‘Site Pairs’
A Site Pair established the connection needed for management, authentication and orchestration of HCX services across a source and destination environment.

Further, into the ‘Multi-Site Service Mesh’, you will notice option for the network properties i.e. ‘Network Profile’.
The Network Profile is an abstraction of a Distributed Port group, Standard Port group, or NSX Logical Switch, and the Layer 3 properties of that network. A Network Profile is a sub-component of a complete Compute Profile.
Create a Network Profile for each network you intend to use with the HCX services.
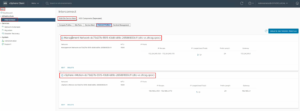
Next we will walkthrough a Service Mesh.
An HCX Service Mesh is the effective HCX services configuration for a source and destination site. A Service Mesh can be added to a connected Site Pair that has a valid Compute Profile created on both of the sites.
Adding a Service Mesh initiates the deployment of HCX Interconnect virtual appliances on both of the sites. Interconnect Service Mesh is always created at the source site.
Once the Service Mesh created, you can verify the Service Mesh Topology
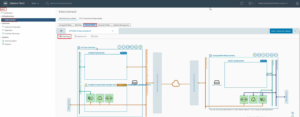
Here we see the different HCX Fleets services deployed. If you click the drop-down arrow next to any of the services, more information will be shown. This includes options to Redeploy the appliance.
Notice all the status should be Active and Tunnel is Up.
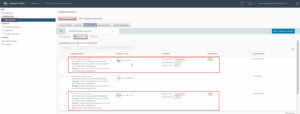
Once the ‘Multi-Site Service Mesh’ is configured successfully, we will now extend network to the Cloud.
The VMware HCX Network Extension can be used to create bridged multi-gigabit network segments at the target VMware HCX data center. The new stretched network is automatically bridged/aggregated with the vSphere Network at the source VMware HCX data center.
You can extend HCX networks either by configuring an individual Distributed Port Group using its context menu, or by selecting multiple Distributed Port Groups in the HCX User Interface.
In my setup, I have extended two of my VxLan segments DB & Web Tiers.

Once the Networks are extended to Cloud, we should be able to migrate the Virtual Machines with VMware HCX.
Workloads can be migrated bi-directionally between data centers using various VMware HCX migration technologies.
In the next blog will migrate Virtual Machines.
Hope you enjoyed this post, I’d be very grateful if you’d help sharing it on Social Media. Thank you!
One Comment
Pingback: