Dell EMC VxFlex HCI Platform for Kubernetes Stateful Applications
This blog showcase VxFlex OS Container Storage Interface (CSI) driver to deliver persistent storage for PostgreSQL database running on Kubernetes Container
VxFlex Integrated Systems and VxFlex Ready Nodes, also known as the Flex family, create a server-based SAN by combining storage virtualization software, known as VxFlex OS, with Dell EMC PowerEdge servers to deliver flexibility, scalability, and capacity on demand. Local storage resources are combined to create a virtual pool of block storage with varying performance tiers. The Flex family enables you to start small (with as little as four nodes) and scale incrementally.
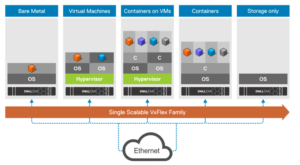
VxFlex OS is capable of supporting a single, scalable block storage service across hypervisors, container platforms and other data center services.
VxFlex OS offers true block storage as a service:
• Provisioned natively through Kubernetes
• Dynamically create and delete volumes on demand
• Support quality of service and security context through container storage interface
• Dynamically scale storage service to match demand
• Support fully non-disruptive updates without future fork-lift migrations
Prerequisites
- Installation and configuration of VxFlex OS cluster per best practices
- Kubernetes cluster installed
- VxFlex OS storage data client (SDC) deployed and configured on each Kubernetes worker/slave node
- Helm installed in your Kubernetes cluster
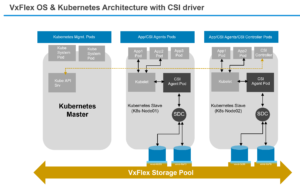
Kubernetes architecture with VxFlex OS CSI driver
The Kubernetes cluster for this demo was built with one master node and 2 worker nodes deployed on VxFlex OS.
Installing the VxFlex OS CSI driver using Helm
After deploying the Kubernetes cluster with the SDC in each worker node and installing Helm, you can easily deploy the VxFlex OS CSI driver using the available Helm chart for VxFlex OS CSI installation.
Using a command shell, add the VxFlex OS Helm repository to your environment:
# helm repo add vxflex https://vxflex-os.github.io/charts

Install the CSI driver by providing the required values in vxflex.yml file
#helm install –name vxflex-csi –values=vxflex.yml vxflex/vxflex-csi
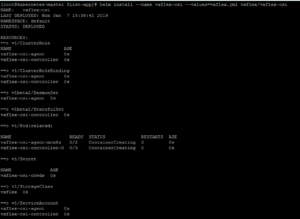
Now, verify the pods. It created 3 agent pods on each of the nodes and one controller pod.
# kubectl get pods -o wide –namespace default
Install PostgreSQL using Helm with the following command
#helm install stable/postgresql
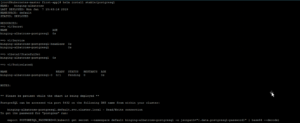
Verify that the PostgreSQL pod is running.

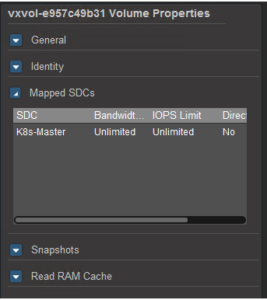
Verify that the volume was created using VxFlex OS GUI
Demonstrating benefits of persistent storage with PostgreSQL
We are going to demonstrate the behavior of persistent volumes if there is a pod failure or crash due to an unforeseen situation. The pod was deployed as a replica set, as defined by the stable/postgresql Helm chart, which ensures that specified numbers of replicas should be running at any given point. In the following example, we terminate a pod. It automatically deploys the pod on another node and dynamically maps the existing PersistentVolumeClaim.
Before you kill the Pod make sure you have added some data into the postgresql database using below script and command. The scripts are available on DellEMC site.
#./pgbench_script.sh yucky-mole bench
In one shell, run the command to terminate the pod and ensure that it moves to another host
#./pgbench_script.sh yucky-mole kill-and-move

In the second shell, observe that pod is terminated and recreated on another host
#kubectl get pods -l release=’singing-squid’ -o wide -w

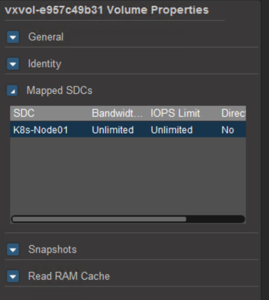
The Pod has been moved from k8s-master to k8s-node01. Also noticed VxFlex Volume mapping moved from K8s-master to K8s-Node01
Hope you enjoyed this post, I’d be very grateful if you’d help sharing it on Social Media. Thank you!