VCF on VxRail Integration & Use-Cases Testing with VMC on AWS Blog Series – Part 1: VPN & Hybrid Linked Mode (HLM)
VMware Cloud Foundation on DellEMC VxRail has been acclaimed as the simplest and quickest path to a hybrid cloud.
In this part 1 of 5 parts blog series, I will provide an overview of VMC integration with VCF on VxRail, walkthrough various Use-Cases and provide detail technical aspects that I captured during the testing.
Before we discuss VMC Integration and Use-Cases, please go through Dell EMC VxRail and VMware Cloud Foundation solutions & offering. Having a good understanding of each of these respective offerings will be helpful throughout this blog series.
Let’s proceed with VMC integration and Uses-Cases.
First Use-Case I am going to cover is ‘Hybrid Linked Mode (HLM)’.
Hybrid Linked Mode allows you to link your VMware Cloud on AWS vCenter Server instance with an on-premises vCenter Single Sign-On domain. If you link your cloud vCenter Server to a domain that contains multiple vCenter Server instances linked using Enhanced Linked Mode, all of those instances are linked to your cloud SDDC.
Using Hybrid Linked Mode, you can:
- View and manage the inventories of both your on-premises and VMware Cloud on AWS data centers from a single vSphere Client interface, accessed using your on-premises credentials.
- Migrate workloads between your on-premises data center and cloud SDDC.
- Share tags and tag categories from your vCenter Server instance to your cloud SDDC.
There are two ways to configure and setup Hybrid Linked Mode.
- Configure Hybrid Linked Mode using the Cloud Gateway Appliance
- Configure Hybrid Linked Mode from the Cloud SDDC
In this part of the blog, we will cover second option to configure Hybrid Linked Mode i.e. ‘Configure Hybrid Linked Mode from the Cloud SDDC’
Pre-Requisites
Common Prerequisites
- NTP: Tolerate a time skew of up to 10 mins
- Ensure a VPN or a Direct Connect exists
- Maximum Legacy of 100 msec roundtrip
- Identify an On-Premises AD group which will be assigned Cloud Administrator Permissions
- On-Premises DNS server configured
- Cloud vCenter resolution should be set to resolve on Private IP
- O-Premises Firewall on the cloud side allows required ports
- Ensure that you have the admin credentials for your On-Premises Sphere SSO domain.
Prerequisites for Linking from Cloud SDDC
- On-Premises vCenter server is running one of the following
- vSphere 6.0 Update 3 Patch C and later
- vSphere 6.5 patch d and later
Next, opening firewall port from On-Premises datacenter is extremely important for this Use-Case to work. Make sure you work with your On-Premises Network & Cyber team to get the necessary firewall ports opened. Refer VMware Documentation for further details on list of Ports.
Key points to remember
- AD should be added as an Identity Source at On-Premises vCenter and Cloud vCenter both
- The On-Premises AD group which will be assigned Cloud Administrator privileges, needs to be directly granted global permissions at the On-Premises vCenter
- Only users from the AD that are also in the Cloud Administrator group will be able to view both On-Premises and Cloud vCenter.
- Login to Cloud H5C will only show combined inventory view.
Here is how the VPN connectivity looks like when you configure the IPsec VPN between On-Premises Datacenter and VMC SDDC on AWS.
Notice VMC SDDC is up & running in Asia Pacific (Singapore).
You can verify the active VPN connection from ‘Networking & Security’ tab of VMC SDDC console.
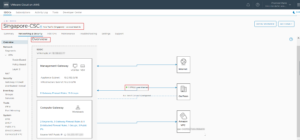
You can get more detailed information of VPN connection Network UI on left hand side, scroll down to VPN and then select the appropriate VPN that is configured. In my case I am using Policy Based VPN.
A policy-based VPN creates an IPsec tunnel and a policy that specifies how traffic uses it. When you use a policy-based VPN, you must update the routing tables on both ends of the network when new routes are added
- Local IP Address for the VPN – Specify a public IP address to have the VPN connect over the Internet
- Remote Public IP – Enter the Remote Public IP address of your on-premises gateway
- Remote Private IP – if your on-premises gateway is behind a NAT device, enter the gateway address as the Remote Private IP. Enter each network in CIDR format.
- Local Networks – Specify the Local Networks that this VPN can connect to
- Configure necessary Advanced Tunnel Parameters based on your VPN characteristic and the VPN software/device.

The VPN creation process might take a few minutes. When the policy-based VPN becomes available, you will see Channel Status and Subnet configure shows green light with Up status.
Once the VPN is available, create or update firewall rules as needed on VMC SDDC. To allow traffic through the policy-based VPN, specify Internet Interface in the Applied to field.
Proceed to add On-Premises DNS servers IP entries into the VMC SDDC System DNS. Select ‘Management Gateway’ and add On-Premises DNS servers IP address.
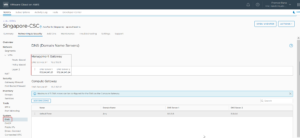
One of the important test you can perform after adding On-Premises DNS servers in to the VMC SDDC DNS system, run the ‘Connectivity Validator’ from VMC SDDC.
The Connectivity Validator allows you to run network connectivity tests to ensure all necessary access is available to perform elect use cases. Note that most test group require some inputs to run tests. If a test fails, follow the recommendation to correct the problem.
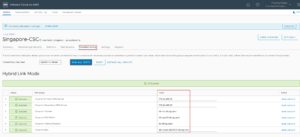
Once the all the above configuration and tests are successful, proceed to login to VMC SDDC Cloud vCenter.
To access the VMC SDDC Cloud vCenter from On-Premises Network (Source) over the VPN, make sure to create ‘Management Gateway’ Firewall rule on VMC SDDC to add the Cloud vCenter (Destination) with necessary services such as ICMP, SSO, HTTPS
We will login to VMC SDDC vCenter using ‘[email protected]’ account.

Have a look the VMC SDDC cloud vCenter. It shows the inventory of the Cloud vCenter.
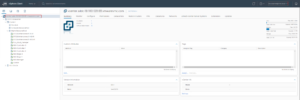
To configure ‘Hybrid Linked Mode (HLM)’, navigate to the ‘Menu’ option and select ‘Administration’
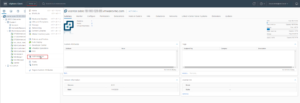
From Administration Menu on left hand side, select ‘Hybrid Cloud’ and click on ‘Linked Domains’.
Setting up HLM is three step procedure.
- Add Identity Source i.e AD over LDAP
- Add On-Premises AD Cloud Administrator Group
- Link to On-Premises vSphere SSO Domain.
Below screen capture shows how to add Identity Source.
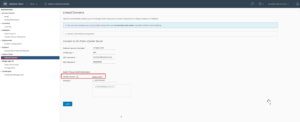
Here is the Identity Source configuration. Please note that Base DN varies based on your AD configuration.
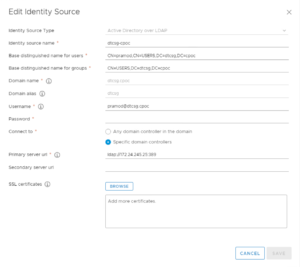
Once the Identity source is configured, add the Local AD Cloud Administrator Group in to the Cloud Admin.
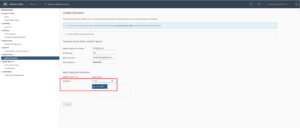
Finally Connect to On-Premises vCenter Server
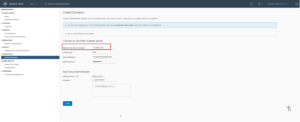
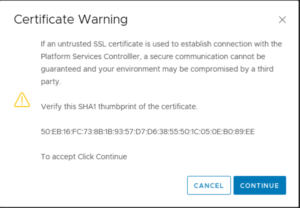
Accept the Certificate warning and click continue.
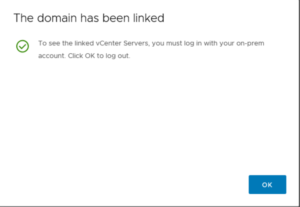
Congratulations! the HLM is successfully configured.
Here is how final configuration looks like in ‘Linked Domains’ under Hybrid Cloud UI.

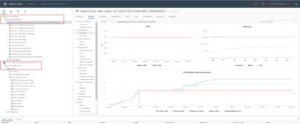
To view and manage the inventories of both your on-premises and VMware Cloud on AWS data centers from a single vSphere Client interface. Login into the VMC SDDC Cloud vCenter using Local On-Premises AD user

Notice you can now manage both the vCenter from Single pane of glass.
Hope you enjoyed this post, I’d be very grateful if you’d help sharing it on Social Media. Thank you!
One Comment
Pingback: